The Outfit Organiser is a tool for managing custom content - clothing, hairs, accessories and make-up (ie, those items used to create a Sim's outfit) - both within the Sims 2 catalog and on the filesystem.
It permits folders to be added, renamed, moved and deleted and package files to be merged, renamed, moved and deleted. Resources can be reclassified (gender, age, category, etc) either individually or together. Tooltips and sort order can also be changed.
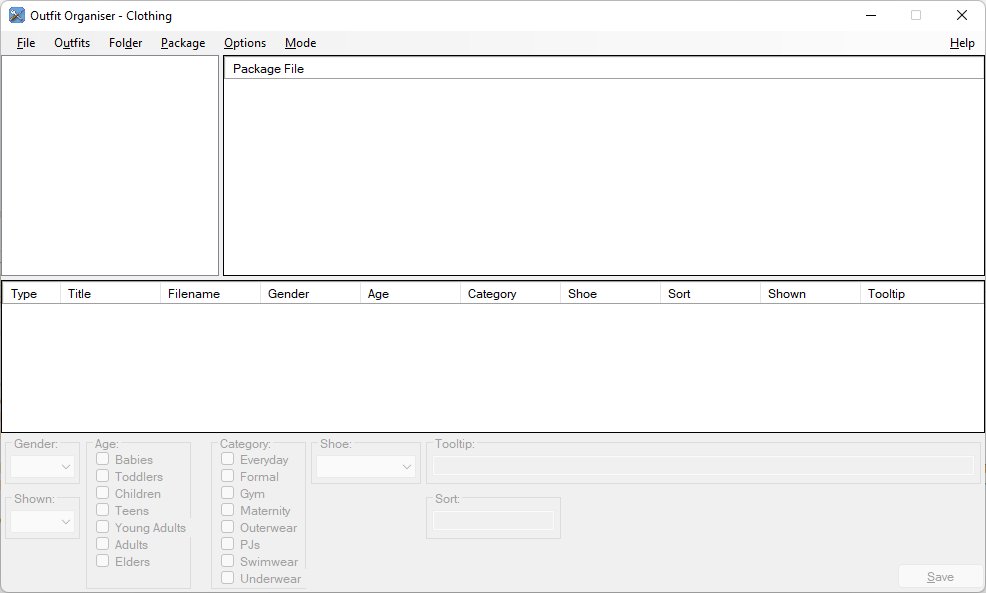
Start the app
From the "File" menu, choose the "Configuration ..." option.
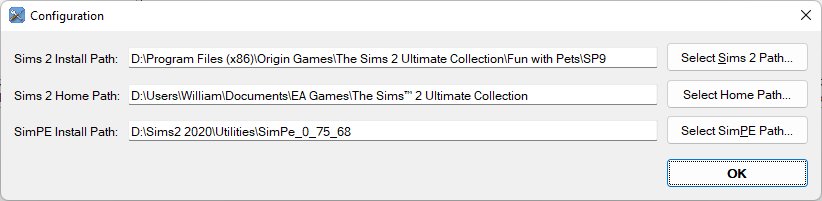
Enter/browse to the "Sims 2 Install Path" and "Sims 2 Home Path". Enter/Browse to the "SimPE Install Path" if installed. Click the "OK" button.
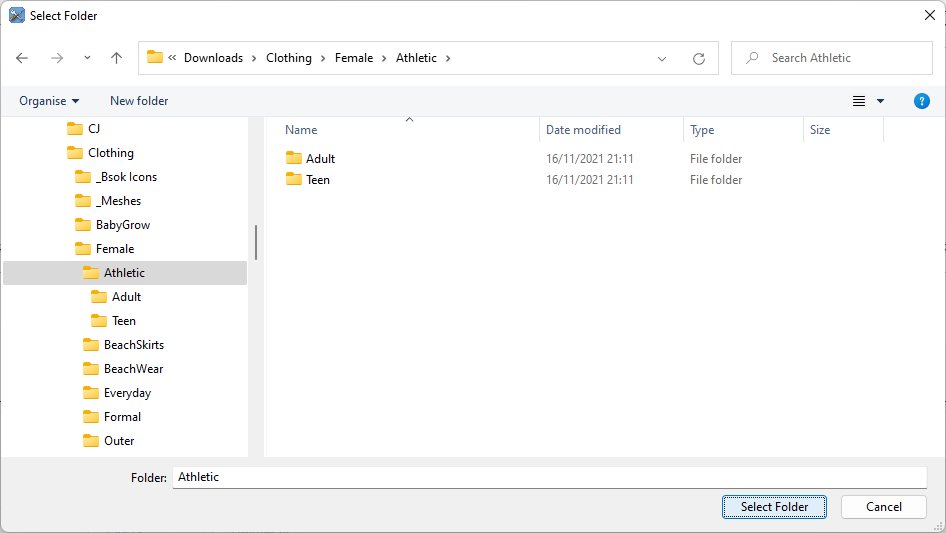
From the File menu, select "Select Folder" (or type Ctrl+O), and select the folder you wish to work with and then press the "Select Folder" button. If the folder has recently been selected, it can also be re-selected from the "Recent Folders" sub-menu
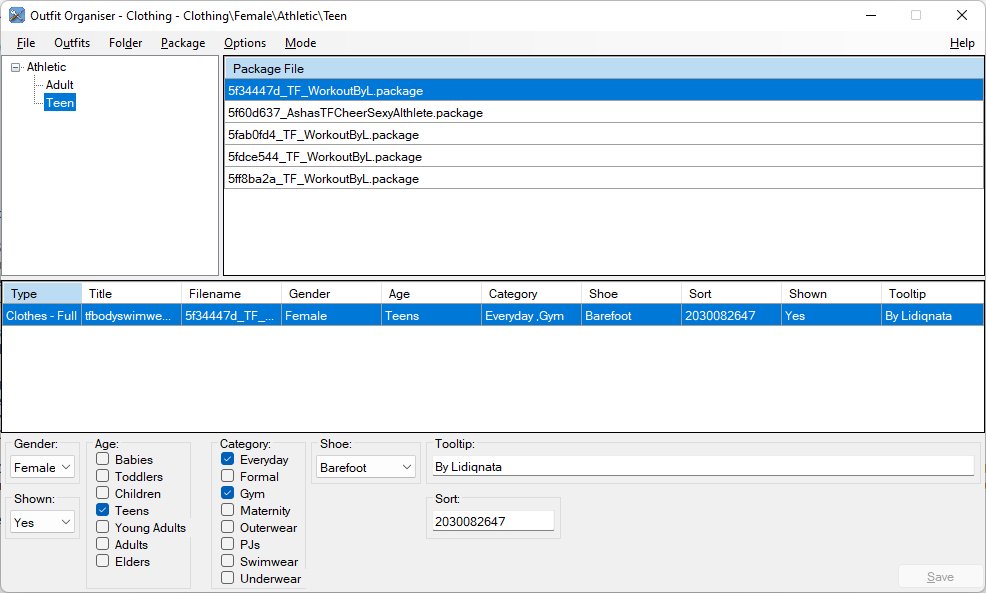
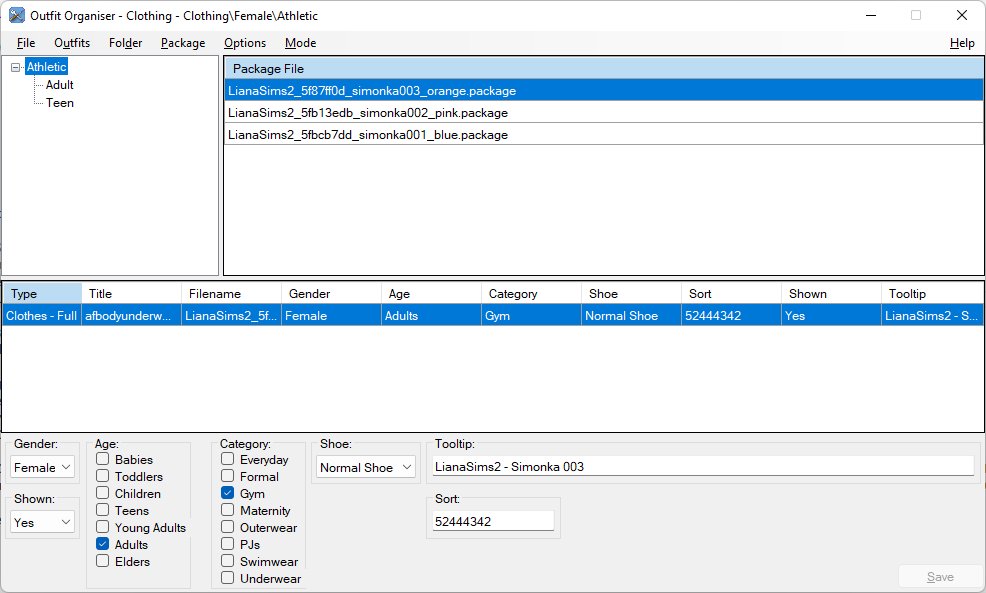
At the top-left, the app displays a navigation tree of the selected folder and any sub-folders. Expand the tree as necessary and click on any folder to display the .package files within that sub-folder.
At the top-right, the app displays a list of all the .package files within the selected sub-folder.
In the middle, the app displays a table of resources found in the selected .package file(s).
At the bottom, the app displays actions that can be performed on the selected resource(s).
The following short (about 2 and a half minutes) video shows the app being used to merge hair resources by type into combined .package files.
Click on any entry to select that folder and display the .package files within it in the top-right table
Right-click on an entry to open a menu of options (the same options are also available from the Folder menu item)
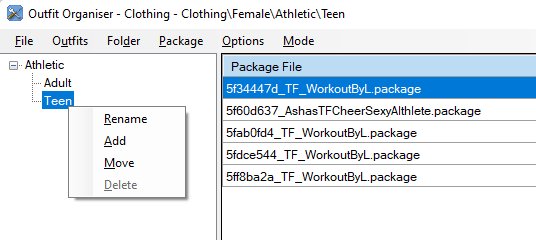
- Add will prompt for the name of the new folder to create
- Rename will prompt for the new name for the folder
- Move allows you to relocate a sub-folder to anywhere on the hard disk
- Delete (only available if the folder is empty) removes the folder to the trash can
In addition to the Move option, you can also drag-and-drop folders within the tree
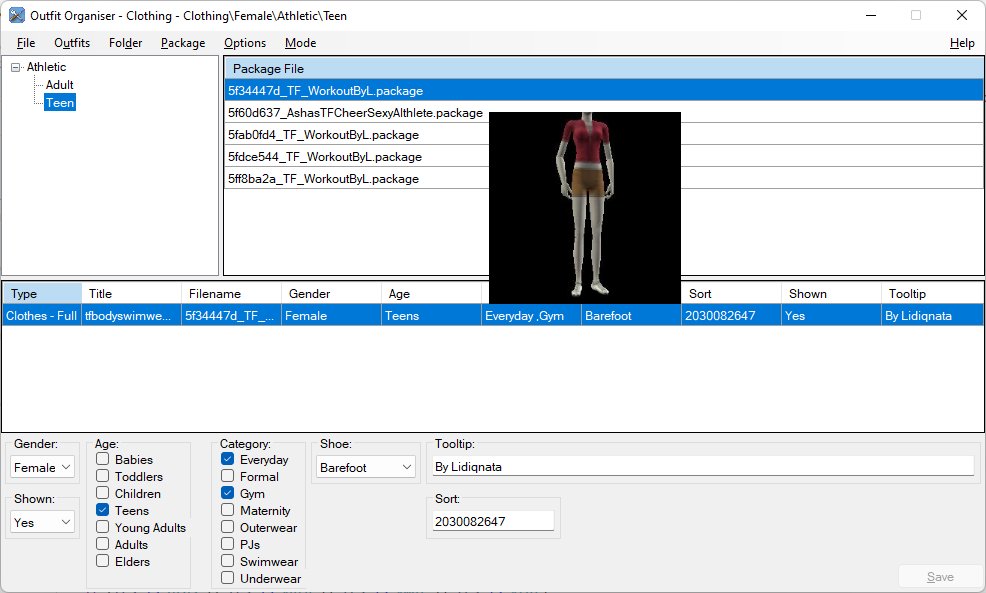
Hovering the mouse over an entry will display the Body Shop icon for the first resource in the package. (If mouse-over icons don't show, either the cigen.package is missing or it is incomplete and you will need to generate the icons via Body Shop.)
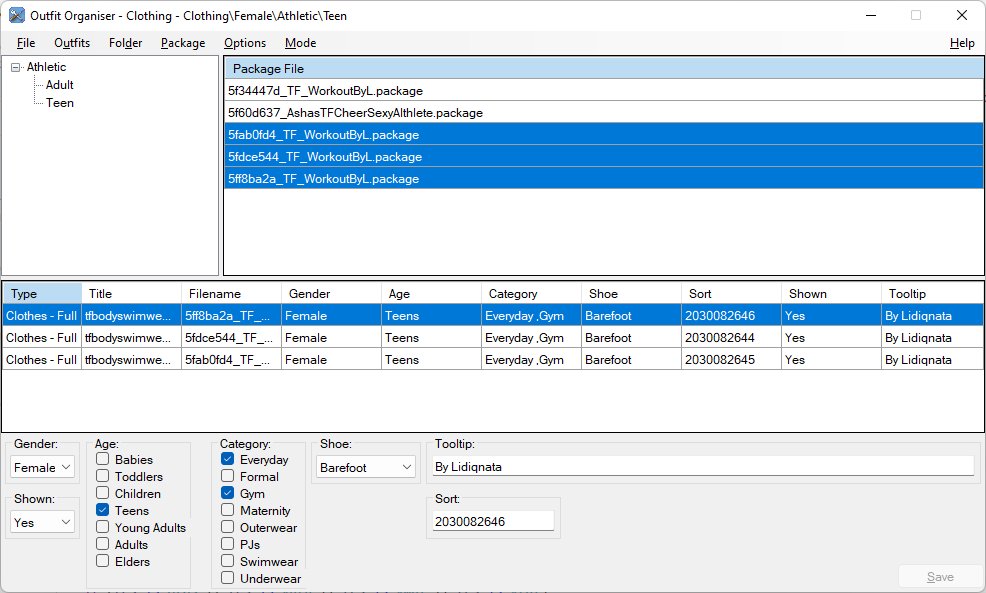
Click on an entry to select it, the middle table will display what resources are within the selected package. Multiple packages can be selected by holding down the shift or control keys and clicking.
Right-click on an entry (or entries) to open a menu of options (the same menu options are also available from the Package menu item)
- Rename (only available if a single package is selected) will prompt for the new name for the package
- Delete removes the selected package file(s) to the trash can
- Merge (only available if two or more package files are selected) combines the resources from all selected packages into the first selected package and removes the other package(s) to the trash can
- Move allows you to relocate the selected package file(s) to anywhere on the hard disk
In addition to the Move option, you can also drag-and-drop package file(s) onto the tree
Each row displays details about the resource(s) in the selected package file(s)
Hovering the mouse over a resource will display the Body Shop icon for that resource
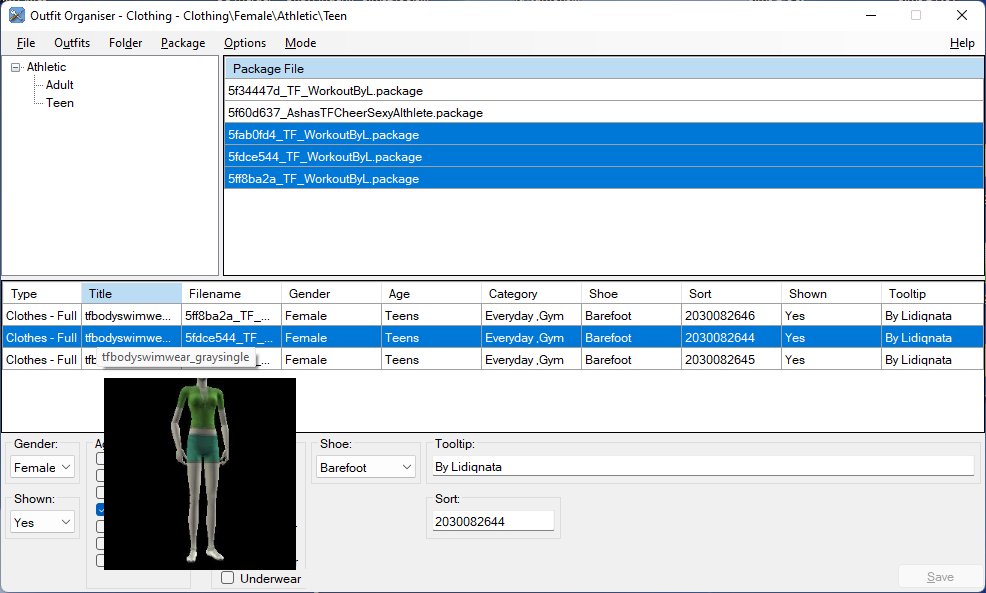
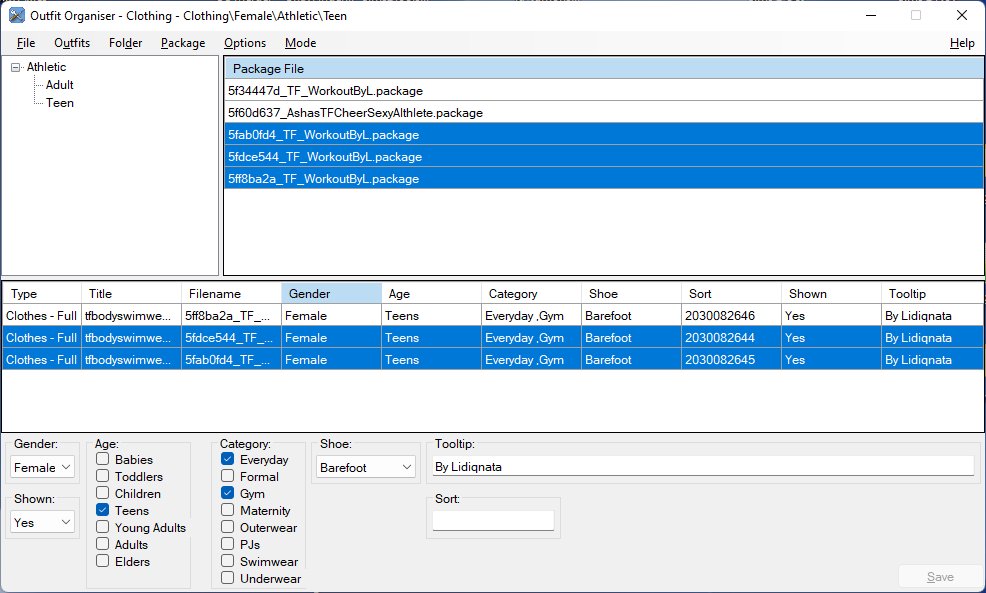
Selecting one or more resources will enable the bottom editor and permit the values associated with the selected resources to be changed
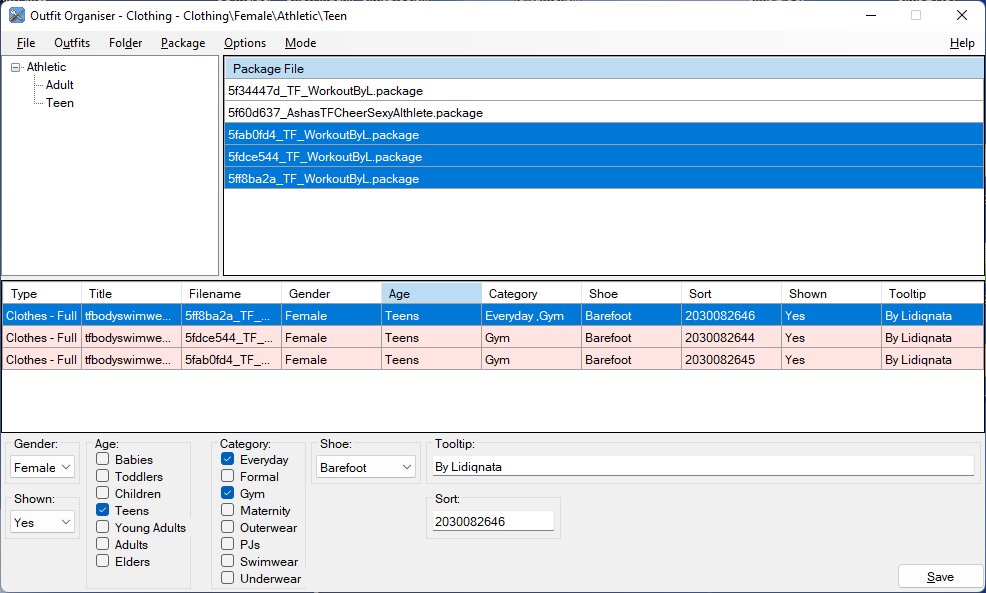
Changing a value in the editor will apply that change to all selected resources. Edited resources have a pale salmon background, as do the package files containing them.
Selecting a single edited resource and then right-clicking will display a menu with an option to restore the original values, clicking on this will undo ALL edits to the selected resource.
If any resources have been edited the Save All button (bottom right) and the File menu Save All item will be enabled. Click either to save all changes to all packages. Backups will be created depending on the setting of the Auto-Backup option of the Mode menu.
Attempting to navigate away from a folder with changes or exiting the app will prompt you for confirmation as changes will be lost.
Due to the way the app works there is a limit on the number of files that can be merged as a single action. This is set to 12 but can be changed if you have a lot of RAM by editing the MaxMergeFiles value in the OutfitOrganiser.exe.config file.
To merge more than the limit, perform the merge as a sequence of smaller merges.
Package File: The package file name INCLUDING the .package extension
Type The type - "Clothes - Full", "Clothes - Top", "Clothes - Bottom", "Hair", "Accessory" or "Make-Up" - of the resource.
Title The internal name of the resource, only really useful to confirm the identity of the resource when using SimPE.
Fileame The name of the package file containing the resource EXCLUDING the .package extension.
Gender The gender(s) the resource is for.
Age The age(s) the resource is for.
Category The clothing categories the resource is for.
Product The product code (Base, Uni, NL, etc or CC) with the resource.
Shoe The shoe sound used with the resource. (Displayed only if "Clothing" is the sole selected Outfit.) Displays as N/A if the resource type is "Clothing - Top".
Hairtone The hairtone the hair is associated with. (Displayed only if "Hair" is the sole selected Outfit.)
Jewelry The jewelry type the accessory is associated with. (Displayed only if "Accessories" is the sole selected Outfit.)
Destination The destination (far east, mountain, etc) the accessory is associated with. (Displayed only if "Accessories" is the sole selected Outfit.)
Subtype The subtype of the makeup. (Displayed only if "Make-Up" is the sole selected Outfit.)
Layer The layer of the makeup. (Displayed only if "Make-Up" is the sole selected Outfit.)
Bin The bin number of the makeup. (Displayed only if "Make-Up" is the sole selected Outfit.)
Sort A number used to determine where in the in-game catalog the resource is displayed.
Shown Determines if the resource is visible in the in-game catalog or not.
Townie If the clothing can be worn by townies. (Displayed only if "Clothing" is the sole selected Outfit.)
Tooltip The tooltip displayed as the mouse is hovered over the resource in the in-game catalog.
When a resource is selected its values are copied into the editor controls. If two or more resources are selected, the editor controls will display values only if all selected resources have the same value for that control, otherwise the control will be empty/blank.
Changing a value in the editor will change the associated value in ALL selected resources.
Gender: A drop-down menu to change the Gender associated with the selected resource(s).
Shown: A drop-down menu to change whether or not the selected resource(s) are displayed in the in-game catalog.
Age: A group of check-boxes to change the Age(s) associated with the selected resource(s).
Category: A group of check-boxes to change the clothing Categories associated with the selected resource(s).
Shoe: A drop-down menu to change the shoe sound associated with the selected resource(s). Only available if the Shoe column is visible.
Jewelry: A drop-down menu to change the jewelry type associated with the selected resource(s). Only available if "Accessories" is the sole selected Outfit.
Destination: A drop-down menu to change the destination associated with the selected resource(s). Only available if "Accessories" is the sole selected Outfit.
Subtype: A drop-down menu to change the makeup type associated with the selected resource(s). Only available if "Make-Up" is the sole selected Outfit.
Layer: A drop-down menu / text entry box to change the makeup layer associated with the selected resource(s). After typing a number into this box it is necessary to press Return/Enter to make the change "stick". Only available if "Make-Up" is the sole selected Outfit.
Bin: A numeric entry box for the bin value of the selected resource(s). After altering this value it is necessary to press Return/Enter to make the change "stick". Only available if "Make-Up" is the sole selected Outfit.
Hairtone: A drop-down menu to change the hairtone associated with the selected resource(s). Only available if the Shoe column is visible. NOTE: There is no way to enter a custom hairtone GUID value.
Sort: A numeric entry box for the sort value of the selected resource(s). After altering this value it is necessary to press Return/Enter to make the change "stick".
Product: A drop-down menu to change the product associated with the selected resource(s). Only available if the Product column is visible.
Tooltip: A text entry box for the tooltip of the selected resource(s). After altering this value it is necessary to press Return/Enter to make the change "stick". The following codes can be used to access other values of the resource.
- $A the age(s) associated with the resource
- $C the clothing categories associated with the resource
- $F the filename without extension of the resource
- $G the gender (female, male, unisex) associated with the resource
- $H the hairtone associated with the resource
- $N the filename with extension of the resource
- $P the product associated with the resource
- $S the shoe sound associated with the resource
- $$ a $ sign
For example, "$F - $A" would become the filename (without extension) that the resource comes from followed by the literal text " - " followed by the age(s) associated with the resource.
Note: Tooltips are usually shared by all resources in a package, so while you can set different tooltips per resource in the editor, for resources in the same package the last one saved will win!
Select Folder: Display the Select Folder dialog.
Recent Folders: A list of reecently selected folders.
Save All: Saves all changes. (Note, it is not possible to save changes on a per file basis.)
Configuration: Display the standard Sims2Tools configuration dialog.
Exit: Exit the utility; if there are unsaved changes a propmt appears.
Clothing: Toggles the display of clothing resources in the selected .package file(s).
Hair: Toggles the display of hair resources in the selected .package file(s).
Accessories: Toggles the display of accessory resources in the selected .package file(s).
Make-Up: Toggles the display of clothing resources in the selected .package file(s).
Rename: Displays the Rename dialog for the currently selected folder.
Add: Displays the Add folder dialog, the new folder is created as a sub-folder of the currently selected folder.
Move: Displays the Move dialog for the currently selected folder. The folder may be moved to anywhere on the filesystem.
Delete: Removes the currently selected folder to the recycle bin immediately. Only available if the selected folder is empty of ALL files.
These options are also availble as a context menu by right-clicking on a folder in the top-left tree view.
Rename: Displays the Rename dialog for the currently selected package file. Only available if a single file is selected.
Move: Displays the Move dialog for the currently selected package files. The file(s) may be moved to anywhere on the filesystem.
Merge: Merges the currently selected package files into the first. Second and subsequent files are removed to the recycle bin. Displays the Rename dialog for the first file. Only available if two or more files are selected.
Delete: Removes the currently selected package file(s) to the recycle bin immediately./p>
These options are also availble as a context menu by right-clicking on a selected package file in the top-right resource table view.
Show Resource Title: Toggles the display of the Title column in the Resource Table.
Show Resource Filename: Toggles the display of the Filename column in the Resource Table.
Show Resource Product: Toggles the display of the Product column in the Resource Table.
Auto-set Layer on Subtype Change: Toggles the automatic update of the Layer value when changing the Subtype.
Auto-set Bin on Layer Change: Toggles the automatic update of the Bin value when changing the Layer.
Preload Meshes: Toggles background preloading of the mesh cache as the application starts.
Load Meshes Now: Forces the loading of the mesh cache.
Auto-Backup: If checked, backup files are created before changes are saved.
Why don't thumbnails display?
To display thumbnails you MUST use Body Shop first to browse all types of clothing, make-up, hairs et al for both genders and all life stages.
Why don't thumbnails display after browsing in Body Shop?
Do NOT delete the cigen.package cache file! Also, not all resources have thumbnails that can be found via known methods.
Can't SimPe do all this (and more)?
Yes, but it forces you to open the .package files one at a time and make the changes. It may also not be obvious what custom content is in which .package files just from the name of the files. Additionally, for packages containing more than one item, you will need to understand the relationships between resources to be sure you are editing the correct item.
Is this a replacement for "Wardrobe Wrangler"?
Depends on how much of the WW functionality you use. WW can do a lot more, but I don't use those features. Also, WW can't merge package files.
Is this a replacement for "CC Merger"?
Not really. CC Merger is a bulk merge tool, this utility only merges a few files at a time within a single folder.
Can I use this to move .package files?
Yes, and also folders.
Can I use this to delete/rename .package files?
Yes, and also folders.
- Alt+D - Folder menu
- Alt+F - File menu
- Alt+H - Help menu
- Alt+M - Mode menu
- Alt+O - Options menu
- Alt+P - Packag menu
- Alt+S - Save All
- Alt+U - Outfits menu
- Alt+F4 - Exit
- Ctrl+O - Open (Select) folder
- Ctrl+S - Save All
- F1 - Help (about)
- F4 - Clothing toggle
- F5 - Hair toggle
- F6 - Accessories toggle
- F7 - Make-Up toggle
The "Townify" button sets the "creator" and "family" values to "00000000-0000-0000-0000-000000000000" and the "flags" value to 0x00000000. In addition, if the outfit is for a young adult and there is no "product" entry it will be added with a value of 0x00000000 (this preserves BSOK settings) and also if the "version" entry is missing or has a value of 0x00000001 it will be added/set to 0x00000000.
See this tutorial for additional information on how to townify clothing (or this one).
See this tutorial on how to bin/townify hairs (or this one).
The link to the Color Binning plug-in given in that tutorial is dead, you can either use the Wayback Machine to access it or download from the Files section below.
The Color Binning Tool V0.2.30.1 works with SimPe 0.73.44.37511 (last "QA" download from SimPE web site) and SimPE 0.75.68.15 (modified by Chris Hatch) - the two versions I use, but it probably works with other versions as well.
To assign/change which BV Jewelry category an accessory appears under first make sure that only Accessories is ticked under the Outfits menu. The Jewelry and Destination resource columns and editor drop-downs will now appear.
Select the package(s) containing the accessories and then the individual accessories to assign and change the Jewelry and Destination drop-downs as required. Click on the Save All button to commit the changes.

To move BV Jewelry back into Accessories (and, by default, placed into the the "Glasses" category), select the BV Jewelry accessories and change the Jewelry drop-down to "Accessory (Non-BV)". Click on the Save All button to commit the changes.
Stuff that I found useful while writing this utility.
- The Ultimate Sims Genetics Tutorial! genetics, hair binnning and a lot more.
- Almighty Hat's SimPE tricks loads of useful information
- DeeDee Sim's basic hair binning tutorial
- MATY thread about BV Jewelry
- MTS GZPS reference
- MTS XTOL reference (make-up)
gummilutt for testing and additional ideas
sushigal007 for testing and additional ideas
gayars for testing and additional ideas
Source code can be downloaded from GitHub
Version 2.0
- Recompiled to fix compression and SimPe issues - see here
- Fixed a bug writing GZPS changes
- Critical fix for accented characters in strings
- Fixed the exception pop-up when a recolour shares its tooltip with the master
- Fixed issue with accessories that are missing BOTH outfit and parts entries in the XMOL
- Added 'bin' column for accessories - this is the numeric value the jewelry drop-down is based on
- Added M&G to the product drop-down list
- Changed Makeup Bin column to be an integer, so sorts correctly
- Added option to display Makeup Layer as numeric only, so sorts correctly
- Detects Pets EP "broken" resources (ie missing "outfit" entry) and flags them with !!! after the Type. Making any changes to such a resource will auto-repair it, or it can be manually repaired from the right-click context menu. Repair is effected by copying the "parts" value as the "outfit" value.
- Added subtype, layer and bin to makeup
- Added Options->Auto-set Layer on Subtype Change
- Added Options->Auto-set Bin on Layer Change
- Added Options->Show Resource Product
- Added product column and drop-down. Setting product to anything other than "*Custom Content" will also set the creator value to 00000000-0000-0000-0000-000000000000
- Added button to townify clothing.
- Improved responsiveness at app start-up when "Preload Meshes" is enabled.
- Added options to save, replace and delete the thumbnail on the resource context (right-click) menu.
- Added option to display meshes (CRES AND SHPE resources) and textures (TXMT resources) associated with selected outfit items.
- Fixed a bug with some missing icons causing a CTD.
- Added the ability to switch accessories between "Glasses" and BV Jewelry categories. See the BV Jewelry Switching section above for details.
- Added $J (Jewelry) and $D (Destination) as tooltip macros.
- Fixed CTD when sorting the resource table by clicking on a column header.
- Removed Hairtone drop-down from the editor. See the "Hair Binning and Townifying" section above for how to correctly change hairtones.
- Warning displayed at start-up if 'cigen.package' cannot be found (thumbnails will be missing).
- Initial release
The .package file format is not completely understood and some applications change it in weird ways that while the game can handle them cause havoc with my DPBF library. Make backups!
- Version 2.0 OutfitOrganiserV2.0.zip
- Version 1.10 OutfitOrganiserV1.10.zip
- Color Binning Plug-In ColorBinningTool_2301.zip