The Repository Wizard is a utility for automating the repository technique for objects and clothing.
It can also be used to "de-repository" (that is, make standalone versions) of clothing.
This mode of the Repository Wizard automates the process described by HugeLunatic in their Repository Technique tutorial.
Some Terms
Donor: A file providing resources used by another file, also known as the master file. Donor files function on their own.
Dependant: A file using resources from a donor, also known as slave files. Dependant files require their associated donor file(s) to function correctly.
Mesh: The shape of the object. Comprises the CRES, SHPE, GMND and GMDC resources.
Subset: A part of the mesh, for example, a sofa usually has two subsets - the frame and the cushions. Within the GMDC, subsets are referred to as groups.
Material: The texture(s) to apply to the mesh, for example, wood grain effect for the frame and fabric swatches for the cushions. Comprises the TXMT and TXTR resources.
Repository Technique: A method to link a dependant file to a donor file such that one or more of the dependant's subsets use the materials from the donor.
Start the application.
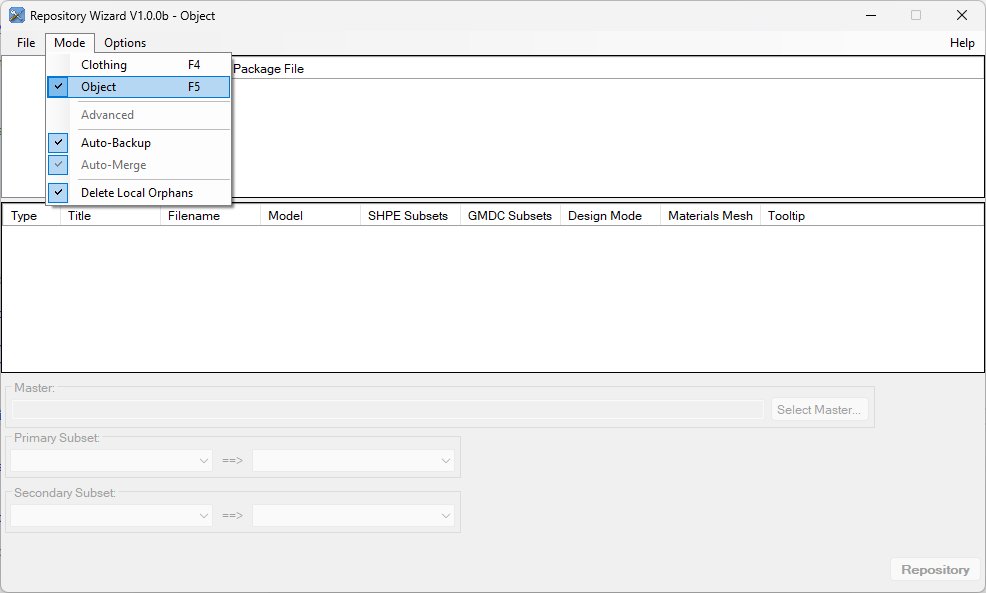
From the "Mode" menu select "Object" (or press the F5 key)
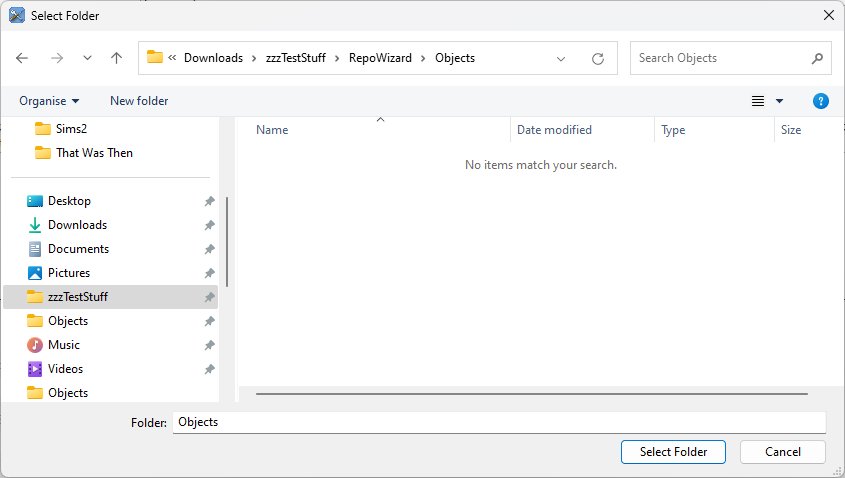
From the "File" menu, select "Select Folder"
navigate to the folder containing the object(s) to be repositoried and click the "Select Folder" button.
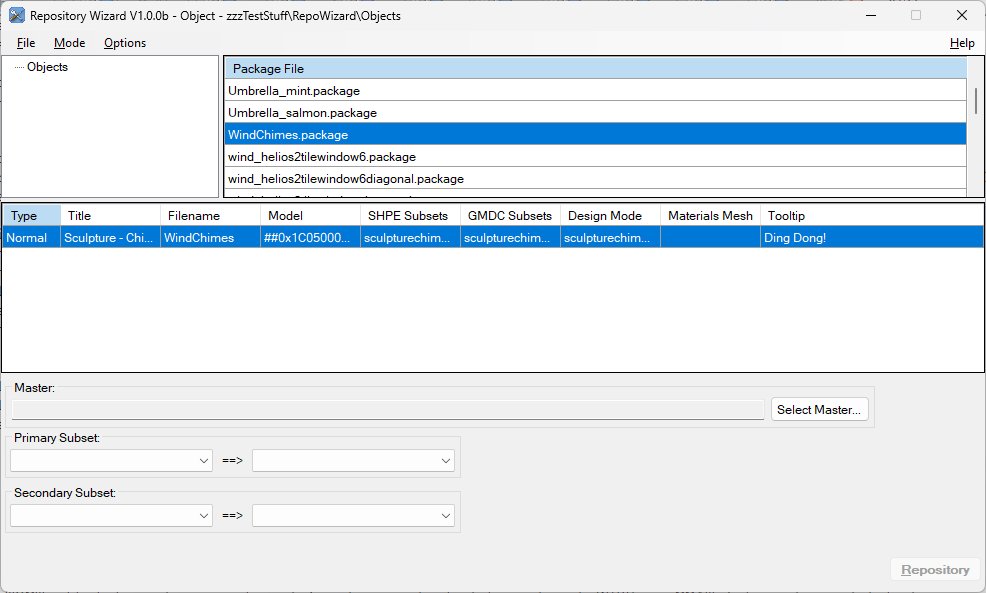
Select the Package File(s) containing the object(s) and then the object(s)
Click the "Select Master..." button
navigate to the folder containing the master package file and select it.
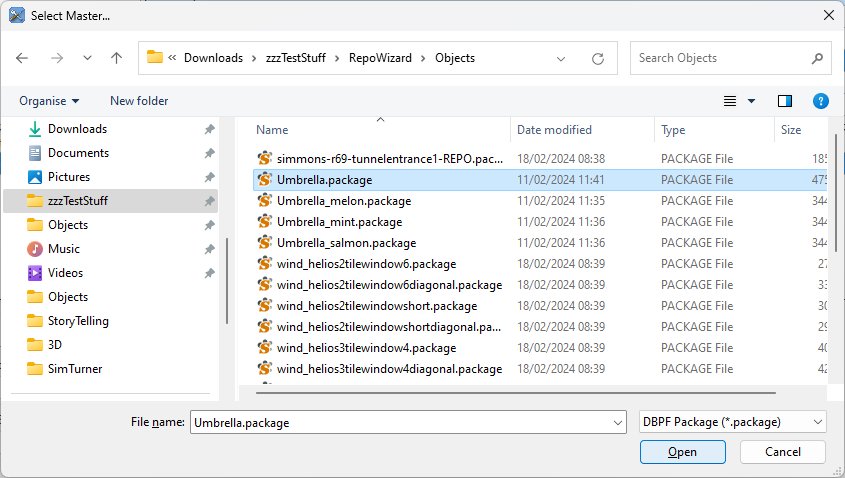
Click the "Open" button.
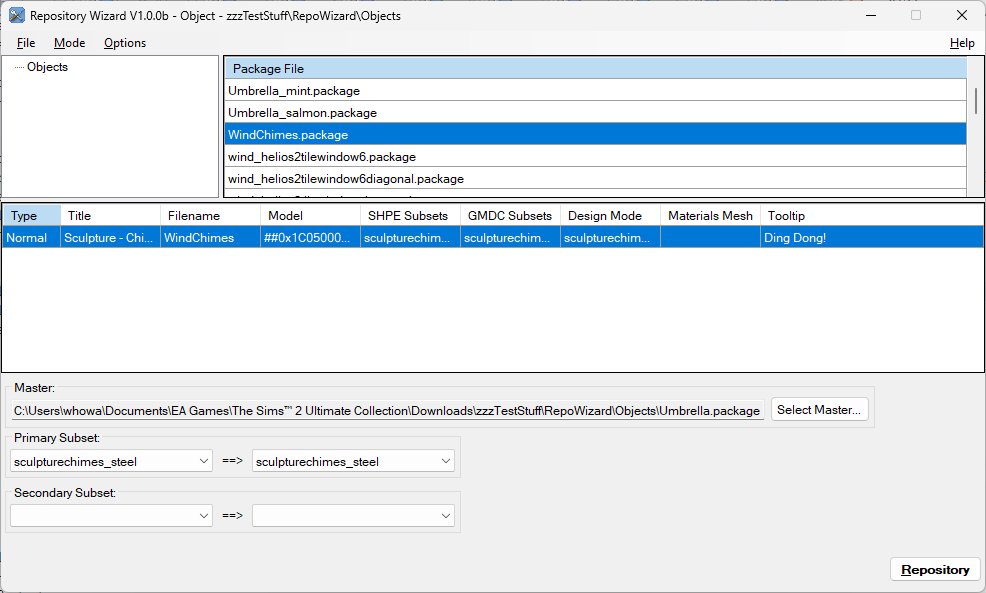
In the Primary Subset area:
- from the left drop-down select the slave subset
- from the right drop-down select the master subset
Click the "Repository" button.
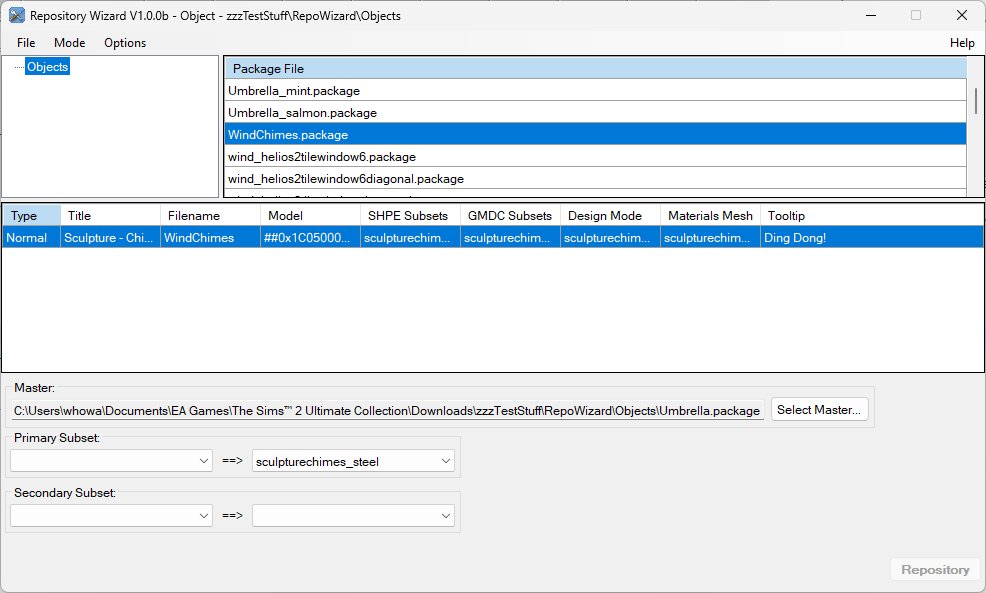
Confirm the object's "Materials Mesh" column has updated.
Process Verification - Object Mode
Using SimPe you can open the slave package file and verify that the following changes were made
- in the SHPE resource(s), the selected subset has been renamed to that of the master subset (if required)
- in the SHPE resource(s), the material associated with the selected subset has been changed to that of the master subset
- in the GMDC resource(s), the selected group (subset) has been renamed to that of the master subset (if required)
- in the GMND resource(s), a tsDesignModeEnabled block has been added (if required)
- in the GMND's tsDesignModeEnabled block(s), an entry of "subset_name = (Array) 0 items" has been added (if required)
- in the GMND resource(s), a tsMaterialsMeshName block has been added (if required)
- in the GMND's tsMaterialsMeshName block(s), an entry of "subset_name = (String) master_mesh" has been added
- all MMATs associated with the object (by guid) AND subset have been deleted
- all TXMTs that have been orphaned (that is, no longer linked from local SHPEs or MMATs) have been deleted
- all TXTRs that have been orphaned (that is, no longer linked from local TXMTs) have been deleted
Advanced Functionality - Object Mode
Two subsets can be repositoried. If they are in the same master file, the second one can be done at the same time as the first by using the drop-downs in the "Secondary Subset" area. If not, after clicking the "Repository" button for the first subset, use the "Select Master" button again to select another master object, use the "Primary Subset" area to select the second subset and click the "Repository" button again.
If the master package file contains multiple objects, a dialog opens to permit the master object to be selected.
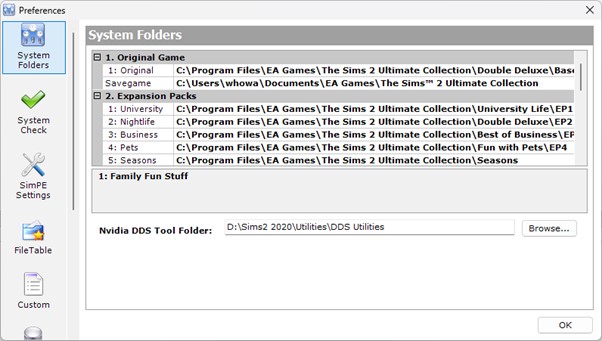
The Repository Wizard knows how to track down scene graph components for Maxis objects, so you can open "objects.package" (et al), however, you MUST have SimPe correctly configured with all the paths to your base game, EPs and SPs for this to work.
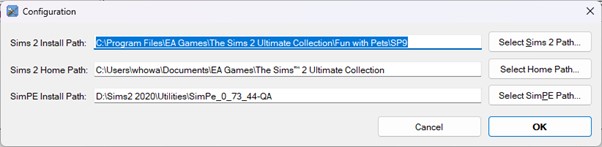
You must also (from the File, Configuration... menu) set the SimPE Install Path.
Known Limitations - Object Mode
Objects with complex scene graphs (multiple CRES resources) will only repository the primary mesh (that is, the CRES indicated by the OBJD's Default Graphic entry).
Resource Table Columns - Object Mode
Type: The type of the object, one of "Normal", "Door", "Window" or "Support".
Title: The object's OBJD name.
Filename: The object's .package file name.
Model: The object's model (mesh) name.
SHPE Subsets: A list of subsets read from the SHPE resource(s).
GMDC Subsets: A list of subsets read from the GMDC resource(s).
Design Mode: The contents of the tsDesignModeEnabled block(s).
Materials Mesh: The contents of the tsMaterialsMeshName block(s).
Tooltip: The object's name from its associated CTSS entry (if any).
This mode of the Repository Wizard creates new recolours for a new/modified mesh based on an existing mesh with its own set of recolours. This is NOT the simple approach to the repository method of linking the dependant's TXMT resource(s) to the donor's TXTR resource(s), but a new, more advanced, approach of linking via the 3IDR resource.
Some Terms
Donor: A file providing resources used by another file, also known as the master file. Donor files function on their own.
Dependant: A file using resources from a donor, also known as slave files. Dependant files require their associated donor file(s) to function correctly.
Mesh: The pattern to make the clothes from. Comprises the CRES, SHPE, GMND and GMDC resources.
Subset: A part of the mesh, for example, a sofa usually has two subsets - the frame and the cushions. Within the GMDC, subsets are referred to as groups.
Material: The fabric swatch(es) to make the clothes from. Comprises the TXMT and TXTR resources.
Outfit Data: Information on how to combine materials and a mesh to produce a specific item of clothing. Comprises the GZPS, BINX, 3IDR and STR# resources.
Example
A yellow swimsuit for adult females has three components:
- the mesh, which defines its shape,
- the material(s), which defines its appearance,
- the outfit data, which combines the mesh and materials and defines how the swimsuit is accessible in-game (age, gender, categories, etc)
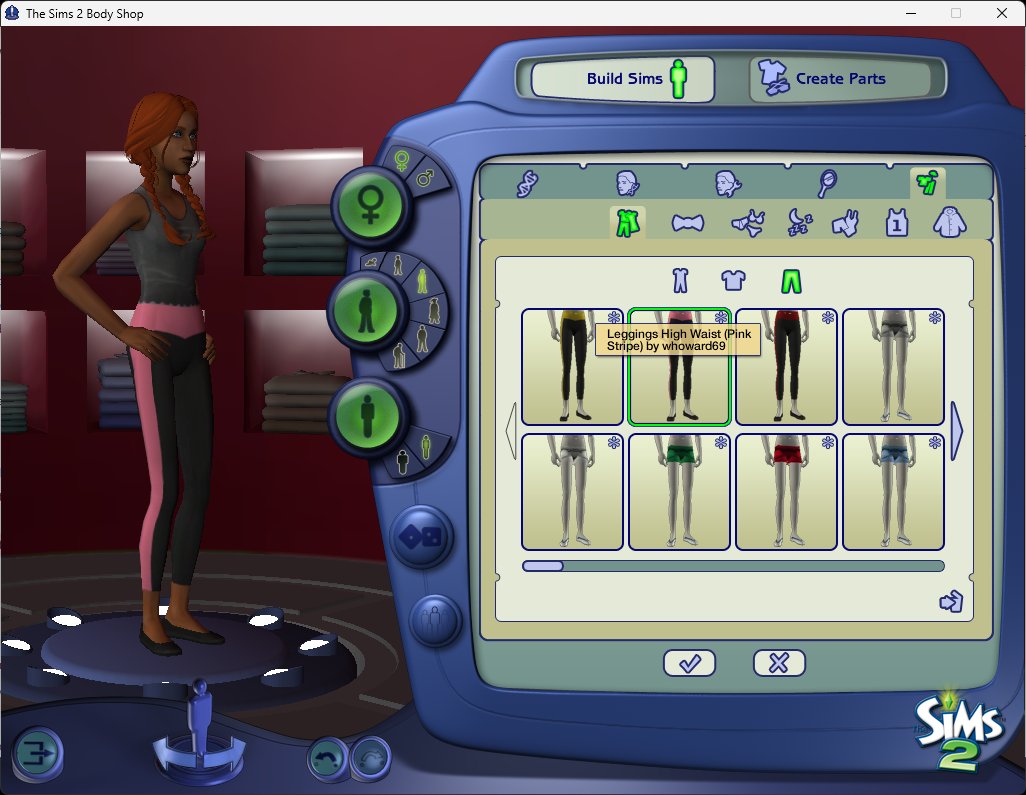
Body Shop Recolours
Body Shop permits us to create re-colours. It does this by copying an existing set of materials (the yellow swimsuit swatches) and creating a new set of outfit data resources combining the new materials with the existing mesh.
The user then recolours the texture (saved by Body Shop as a .bmp image), say to green.
Body Shop is then used to create a new package file for the green swimsuit. This new package file contains both the user edited texture (converted from a .bmp image to a TXTR resource) and the outfit data it generated. Simples!
Mesh Changes?
But what if we want to change the mesh, for example, to a teen or a different body shape (CPU, FM, etc)?
If this case, we need to
- use SimPe to export the mesh,
- modify the mesh (either directly in Blender/MilkShape or via WSO actions),
- create a new mesh package file,
- use Body Shop to create a "re-colour" of the AF yellow swimsuit,
- use SimPe to change what mesh the outfit 3IDR resource links to for this "re-colour" from the original mesh to our new mesh.
With this "master" swimsuit for teen female, we can now use Body Shop to create the other colours.
But we now have multiple copies of identical materials (the yellow material for the AF swimsuit is the same as for the TF one).
Advanced Repository Technique
What we want to do is use the "repository technique" to link the TF outfit resources to the yellow materials used by the AF outfit - after all the materials are NOT age/gender/shape specific (if they are, you CANNOT use these techniques).
So, we need to edit the 3IDR resource for the TF yellow swimsuit to refer to the same materials as the AF yellow one, then delete the unused copies in the TF package file.
Ummm! We're doing a lot of work creating swatches that are ultimately not needed. We also must understand some complex SimPe options/operations and the internal layout of the 3IDR resource.
What we really want (I'll tell you what we want, what we really, really want!) is a way to select one or more donor re-colours (for example, yellow, red, green, blue AF swimsuits) and apply those to a different mesh (for example, a TF version or a CPU version).
And this is exactly what the Clothing Mode of the Repository Wizard enables you to do - zigazig ah!
IMPORTANT NOTE: You can only use the repository technique to share materials among meshes if the UV mapping for each mesh is the same - usually the case when the new mesh has been adapted from the old (for example, via WSO actions).
Start the Repository Wizard application.
From the "File" menu, select Creator Details
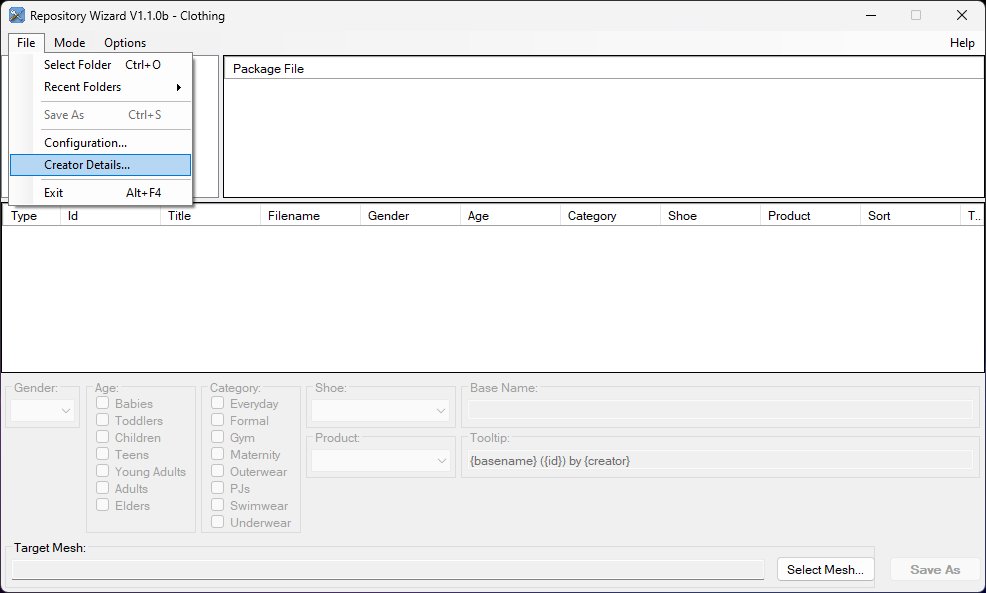
Enter your nick name and guid. The guid can be entered directly if known; if not, use the "Find" button to pick from those in your Body Shop projects or the "Random" button to generate a new one.
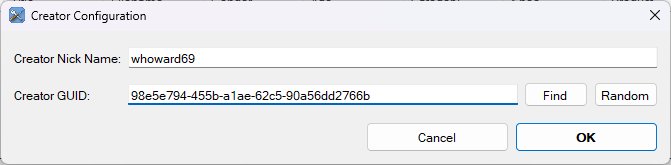
Click OK
NOTE: You only need to do this once.
From the "Mode" menu select "Clothing" (or press the F4 key)
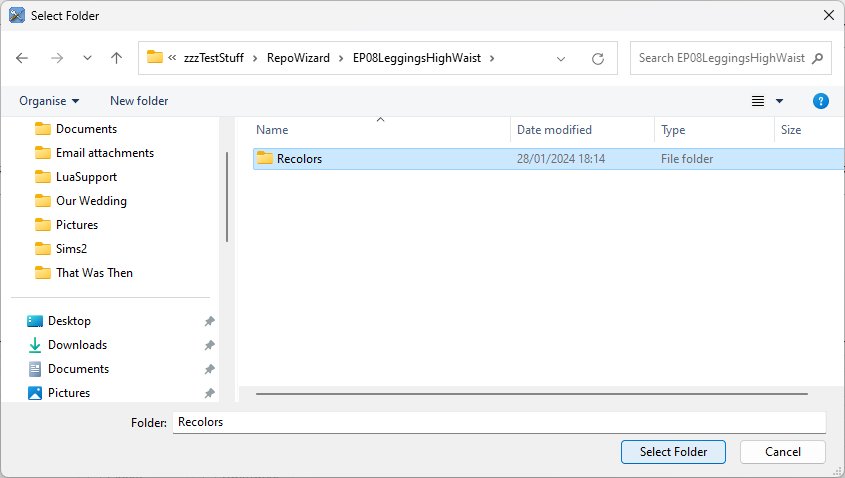
From the File menu, select "Select Folder" and navigate into the folder with the donor re-colour package files. (They must all be in the same folder, but that's just good CC management practice!)
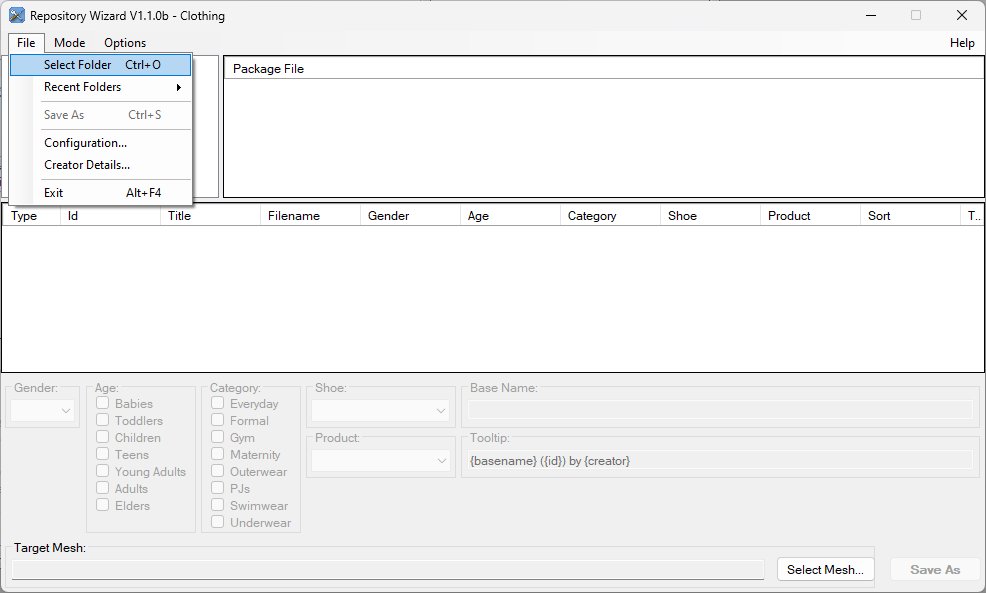
Click the "Select Folder" button.
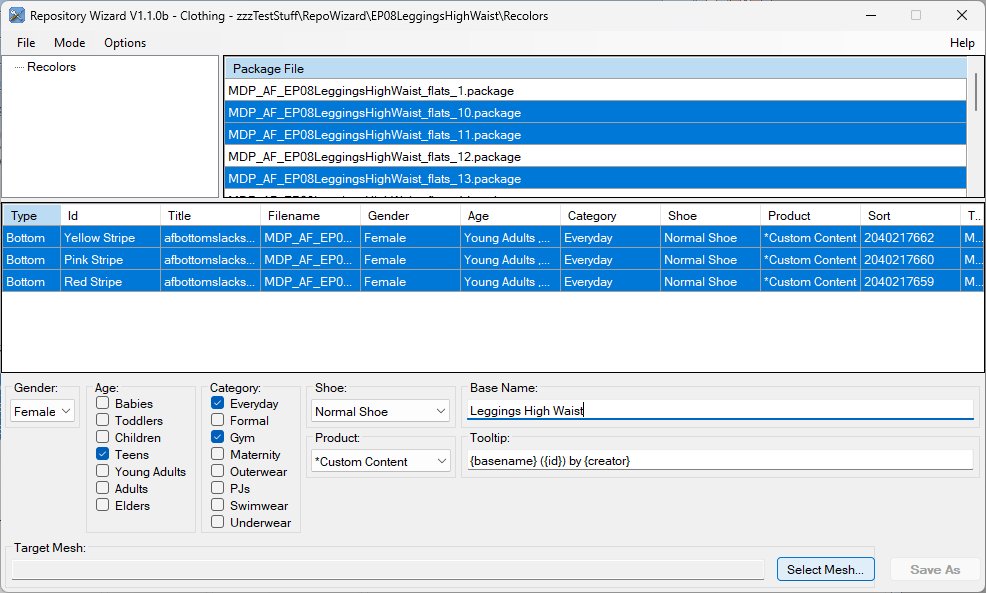
Select the re-colour package file(s) you wish to use - shift-click will select a range, ctrl-click will add/remove a single file to/from the current selection.
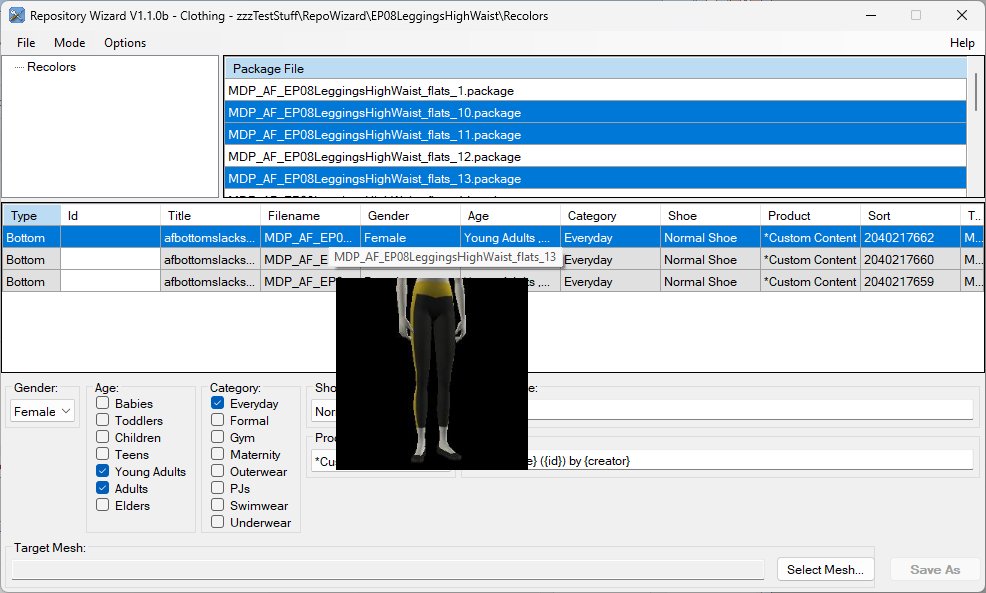
NOTE: Mouse-over thumbnails will only show if the original re-colours have been previously viewed in Body Shop AND the cigen.package file has not been deleted since.
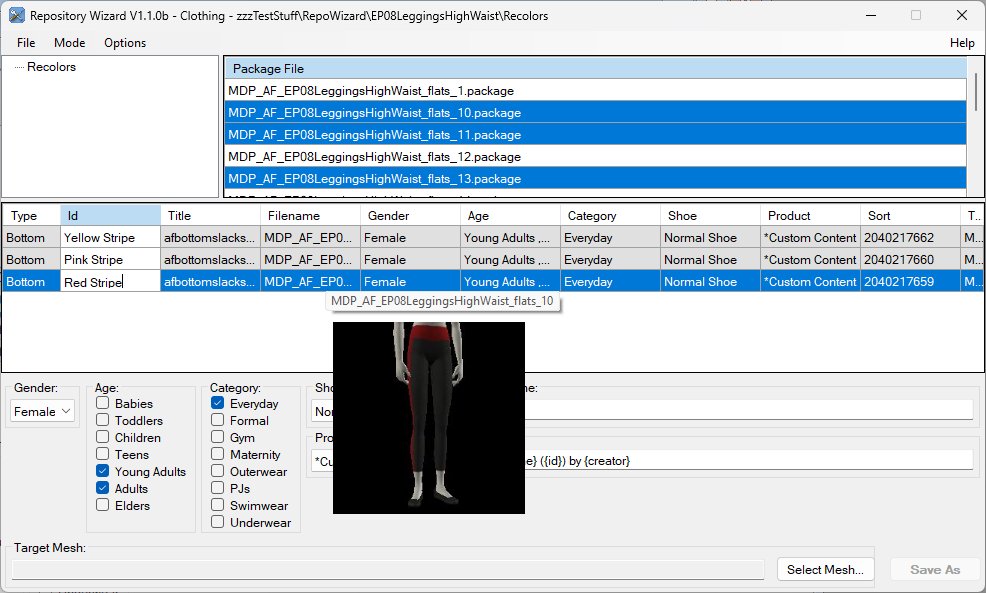
For each re-colour selected, optionally enter an Id (Yellow Stripe, Pink Stripe, etc in this example)
IMPORTANT NOTE: If you change the selected package files after entering IDs they will be lost!
Select all the re-colours to use - shift-click will select a range, ctrl-click will add/remove a single file to/from the current selection.
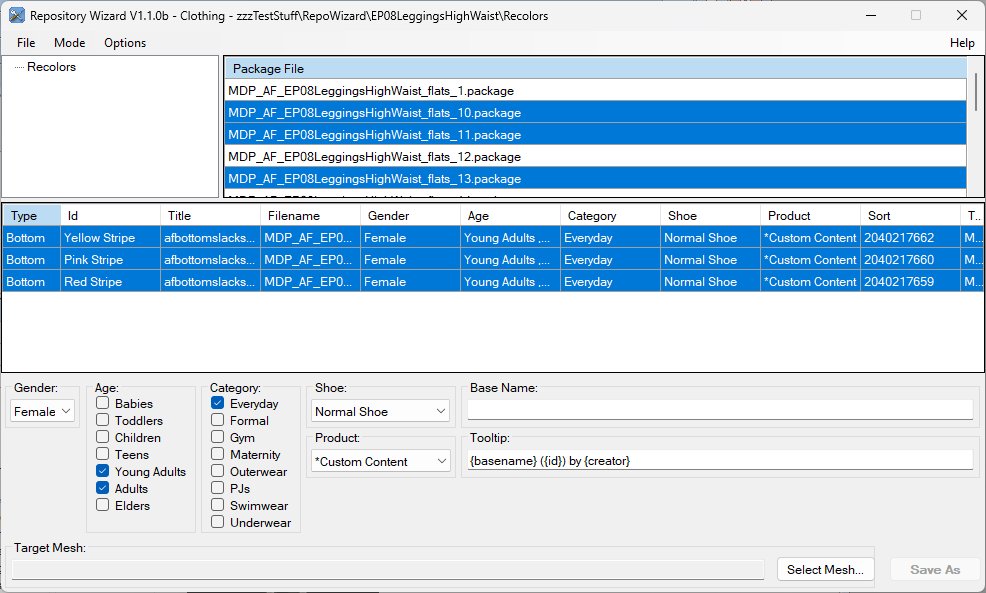
Enter/Change the Gender, Age, Category, Shoe, Product, Base Name and Tooltip as desired.
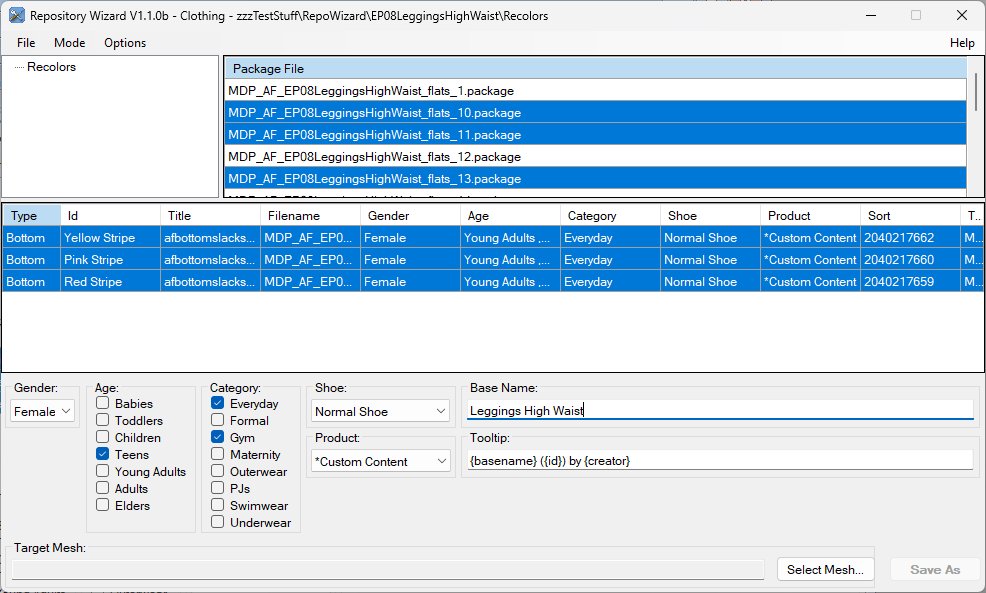
Notice how the tooltip is formed from the Base Name, Id and creator nick name values - by using {macros}
Click the "Select Mesh..." button.
and choose the required mesh package file.
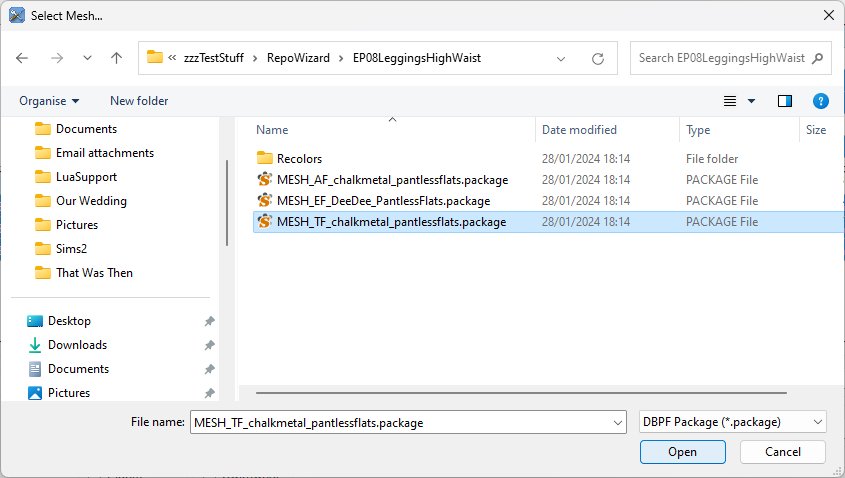
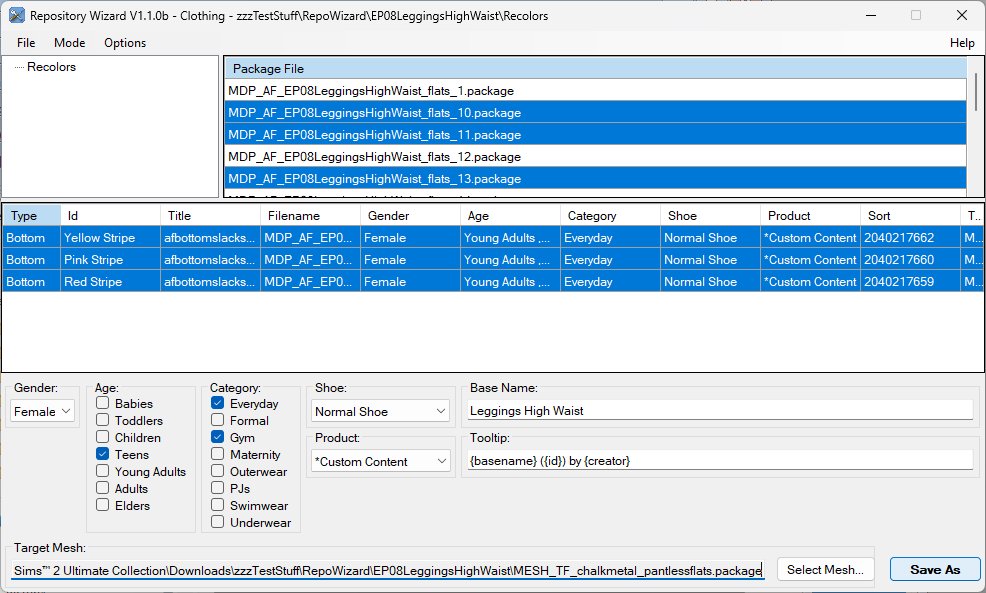
Click the "Open" button.
Click the "Save As" button.
And enter the name of the package file to create.
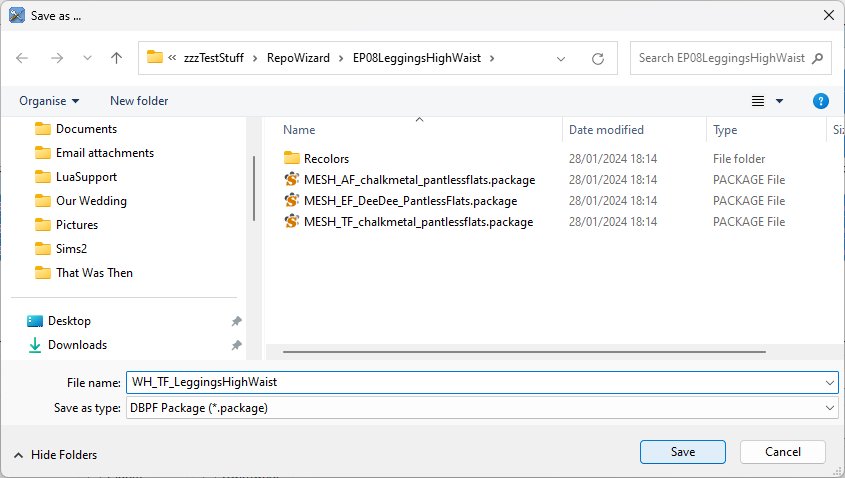
Click the "Save" button.
All being well, a package file containing all selected recolours will be created. If you want individual package files, from the "Mode" menu, uncheck "Auto-Merge".
You should check your new re-colours in Body Shop.
To create another set of re-colours for a different mesh (for example, FM after CPU), change the Base Name (if required), click the "Select Mesh..." button and choose the required mesh, then click the "Save As" button and give a new package file name.
Process Verification - Clothing Mode
Using SimPe you can open the slave package file(s) and verify for each re-colour there are four resources in the same group - 3IDR, BINX, GZPS and STR#.
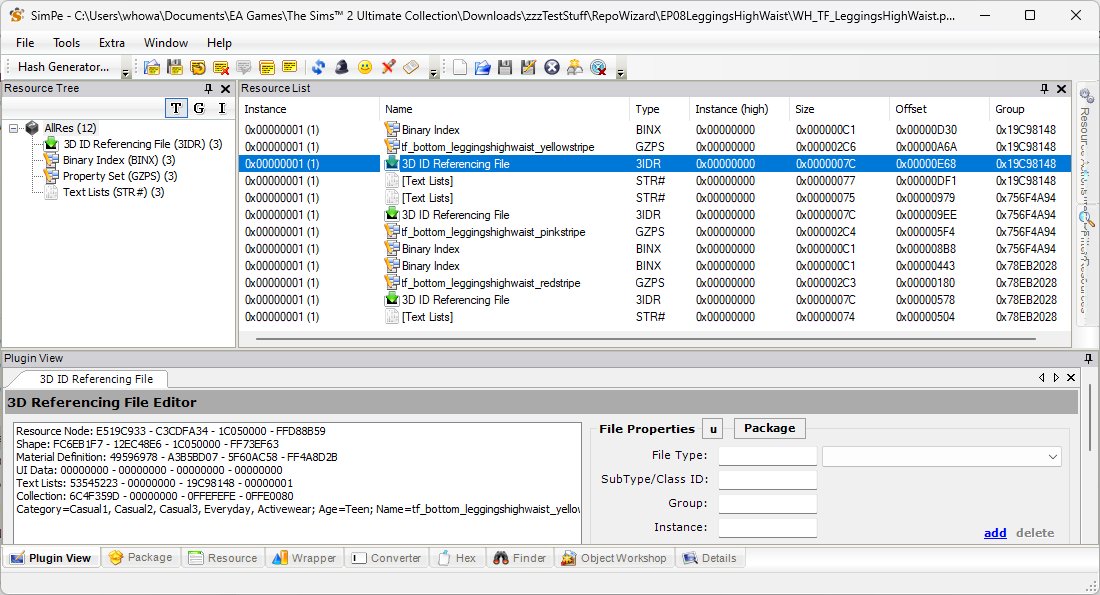
The GZPS resources should have meaningful names and the STR# resources should contain the tooltips. Any errors in the 3IDR/BINX resources will show in Body Shop.
Advanced Functionality - Clothing Mode
By default, the application checks that the correct subset is specified in both the target mesh's SHPE and GMDC resources. These checks can be disabled if required from the Options menu items.
Resource Table Columns - Clothing Mode
Type: The type of the clothing, one of "Top", "Bottom" or "Body".
Id: User enterable identifier. If omitted, defaults to the row number.
Title: The item's OBJD name.
Filename: The item's .package file name.
Gender: The item's associated gender.
Age: The item's associated ages.
Category: The item's associated categories.
Shoe: The item's associated shoe sound.
Product: The item's associated product.
Sort: The item's associated sort value.
Tooltip: The items's tooltip from its associated STR# entry.
This mode of the Repository Wizard automates the process of "de-repositorying" clothing, that is, finding all the textures required by the item and copying them into the item's .package file.
This process creates large .package files with (potentially) many duplicates of texture (TXMT/TXTR) resources.
It is useful if the creator repo'ed a teen version of a item to the adult one and you only want the teen version, as once the teen version has been "de-repo'ed" you can delete the adult item.
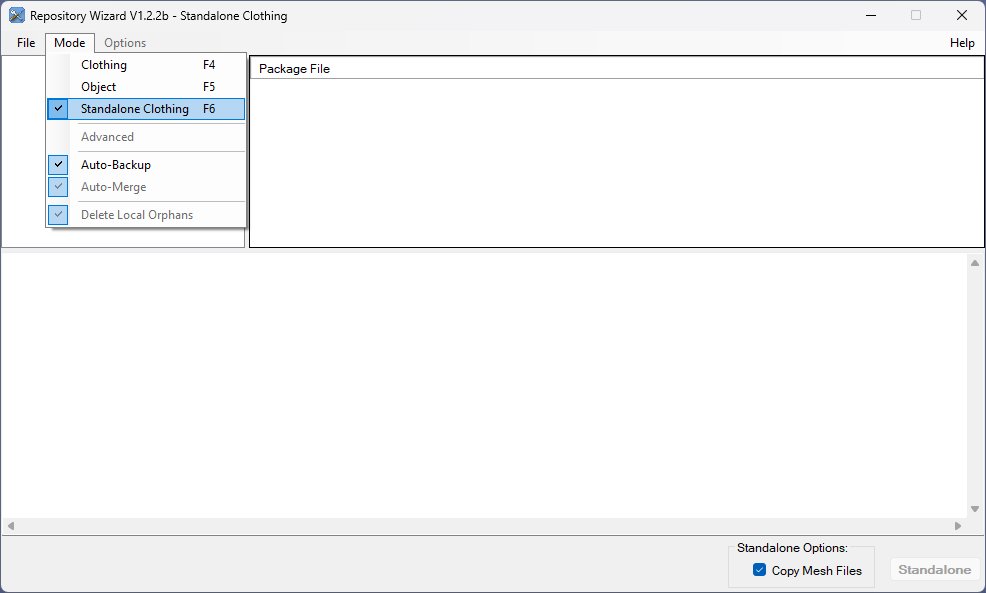
Using Standalone Clothing Mode
Start the application.
From the "Mode" menu select "Standalone Clothing" (or press the F6 key)
From the "File" menu, select "Select Folder"
navigate to the folder containing the all the parts of the clothing items to be de-repo'ed and click the "Select Folder" button.
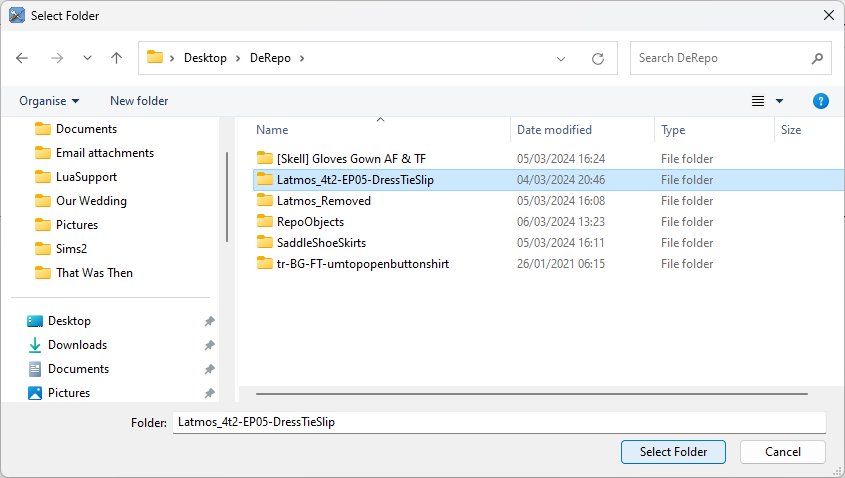
Notice how we selected the top most folder of this set ("Latmos_4t2-EP05-DressTieSlip") as it contains the sub-folders with the textures ("TXTR_Dress" and "TXTR_Sandals") and meshes. If we had selected the sub-folder "RC_Barefoot_Satin" the Repository Wizard won't be able to find them.
In the tree view top left, select the sub-folder that contains the repo'ed re-colours to be converted to standalone, eg "RC_Barefoot_Satin"

In the Package File list, select one or more re-colours.
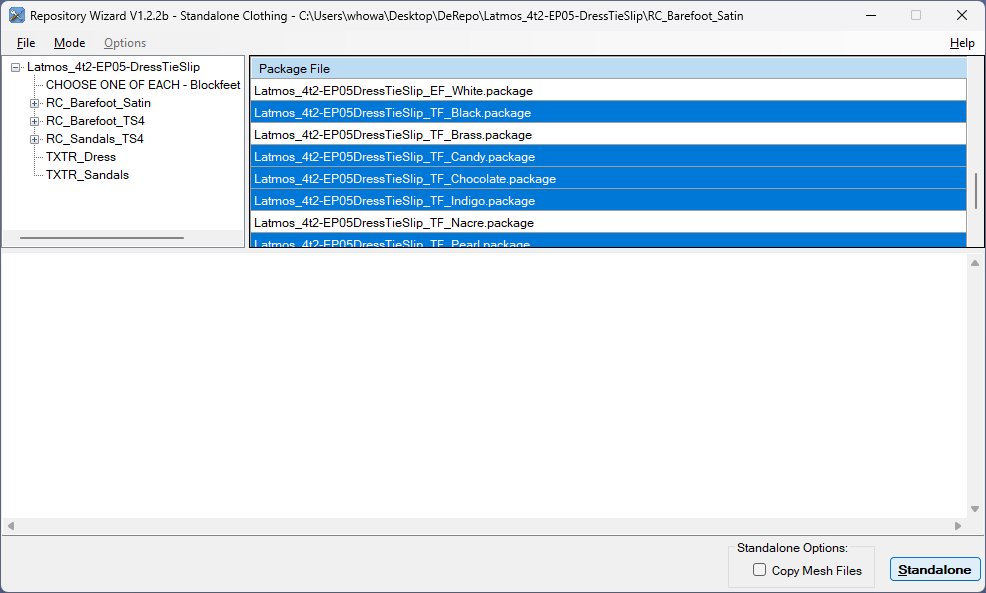
Click the "Standalone" button.
The re-colours will be "de-repo'ed" and written to a "Standalone" sub-folder (eg "RC_Barefoot_Satin\Standalone"). The name used for the "Standalone" sub-folder can be changed in the app's .config file.
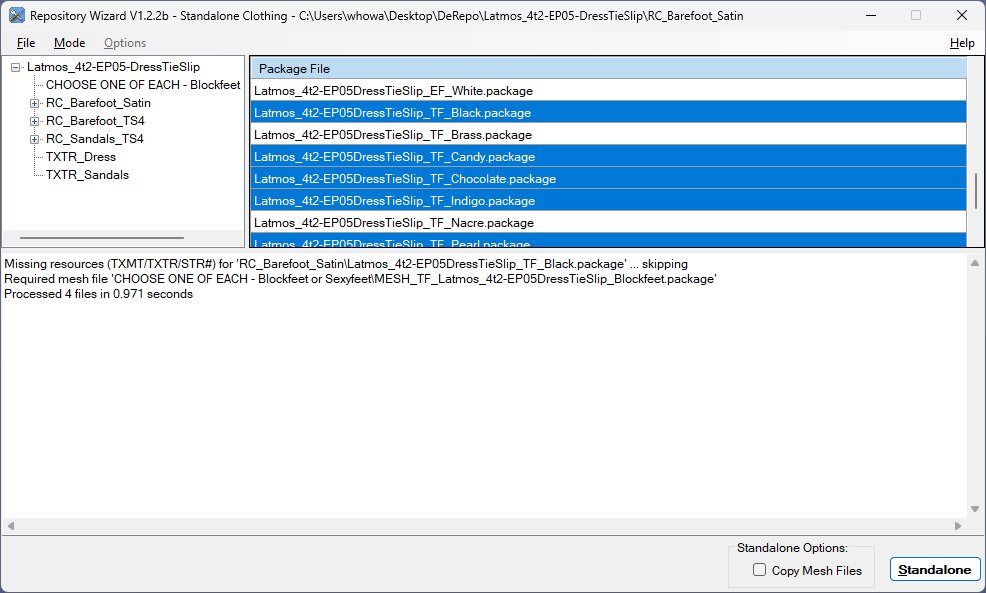
Any missing resources will be reported and the specific re-colour won't be "de-repo'ed" - just for this example I'd removed the black textures.
The files containing the mesh resources required by the standalone re-colours are also reported. If the "Copy Mesh Files" option is checked, the mesh files will be copied into the "Standalone" sub-folder.
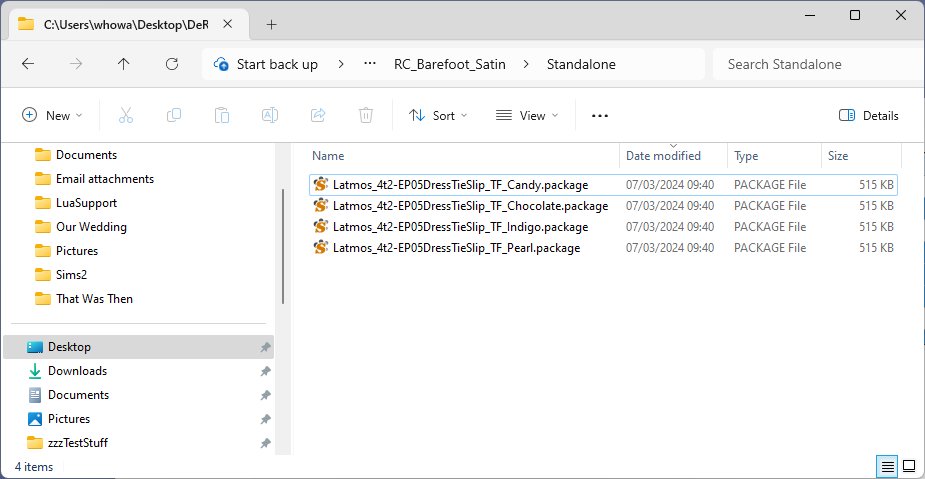
Process Verification - Standalone Clothing Mode
To verify the process worked, check the contents and file sizes of the "Standalone" sub-folder.
Select Folder: Display the Select Folder dialog.
Recent Folders: A list of reecently selected folders.
Save As: Same as clicking the Save As / Repository button.
Configuration: Display the standard Sims2Tools configuration dialog.
Creator Details: Display the standard Sims2Tools creator details dialog; see Using Clothing Mode.
Exit: Exit the utility; if there are unsaved changes a prompt appears.
Clothing: Switches to Clothing Mode.
Object: Switches to Object Mode.
Advanced: Reserved for future use.
Auto-Backup: If checked, backup files are created before changes are saved.
Auto-Merge:Clothing Mode only: If checked, files are merged as part of the save process.
Delete Local Orphans:Object Mode only: If checked, TXMT and TXTR resources that are NOT used within the file are deleted.
Show Resource Title: Adds a column to the table displaying the object's title.
Show Resource Filename: Adds a column to the table displaying the object's filename.
Show Resource Product:Clothing Mode only: Adds a column to the table displaying the object's product
Show Resource Sort:Clothing Mode only: Adds a column to the table displaying the object's sort
Show Resource Tooltip: Adds a column to the table displaying the object's tooltip.
Verify SHPE Subsets:Clothing Mode only: See Advanced Functionality - Clothing Mode.
Verify GMDC Subsets:Clothing Mode only: See Advanced Functionality - Clothing Mode.
- Alt+F - File menu
- Alt+H - Help menu
- Alt+M - Mode menu
- Alt+O - Options menu
- Alt+F4 - Exit
- Ctrl+G - Show/Hide non-local objects
- Ctrl+L - Show/Hide local objects
- Ctrl+O - Open (Select) folder
- Ctrl+S - Save As...
- F1 - Help (about)
- F4 - Switch to Clothing Mode
- F5 - Switch to Object Mode
latmos for the initial suggestion and clothing mode details and testing
HugeLunatic for the original object mode tutorial
marcussimmonscc for extensive object mode testing
Klaartje for initial object mode testing
ocelotekatl for reading a draft of clothing mode
Source code can be downloaded from GitHub
- Enabled Advanced sub-item on the Mode menu.
- Advanced clothing mode displays the GZPS Name text entry box, to permit the default to be changed. Useful when creating recolours for other bodyshapes.
- In Object Mode, fixed bug if the object didn't have STR# 0x0087 "Mesh Groups" and 0x0088 "Material Names" resources.
- In Object Mode, changes to the slave subset name(s) and referenced materials are now refelected in the STR# 0x0087 "Mesh Groups" and 0x0088 "Material Names" resources.
Version 2.0
- Recompiled to fix compression and SimPe issues - see here
- Moved the "Select Mesh" button back onto the form - ooops!
- Added Standalone Clothing mode.
- Fixed problem with scenegraph names being longer than 127 characters.
- Initial release
- Version 2.3 RepositoryWizardV2.3.zip
- Version 1.3 RepositoryWizardV1.3.zip
Tutorials by other Simmers (files cached with permission)
- Repository Clothes using the Repository Wizard by LatmosSims (pdf) - latmossims_V1.0.zip